Languages: How to Translate Text (Keys)
Translating Language Text
After adding a new language, this is where you perform the actual translation. The system uses a "key-value" pair structure. You only need to change the text (value), not the identifier (key).
Understanding the Interface
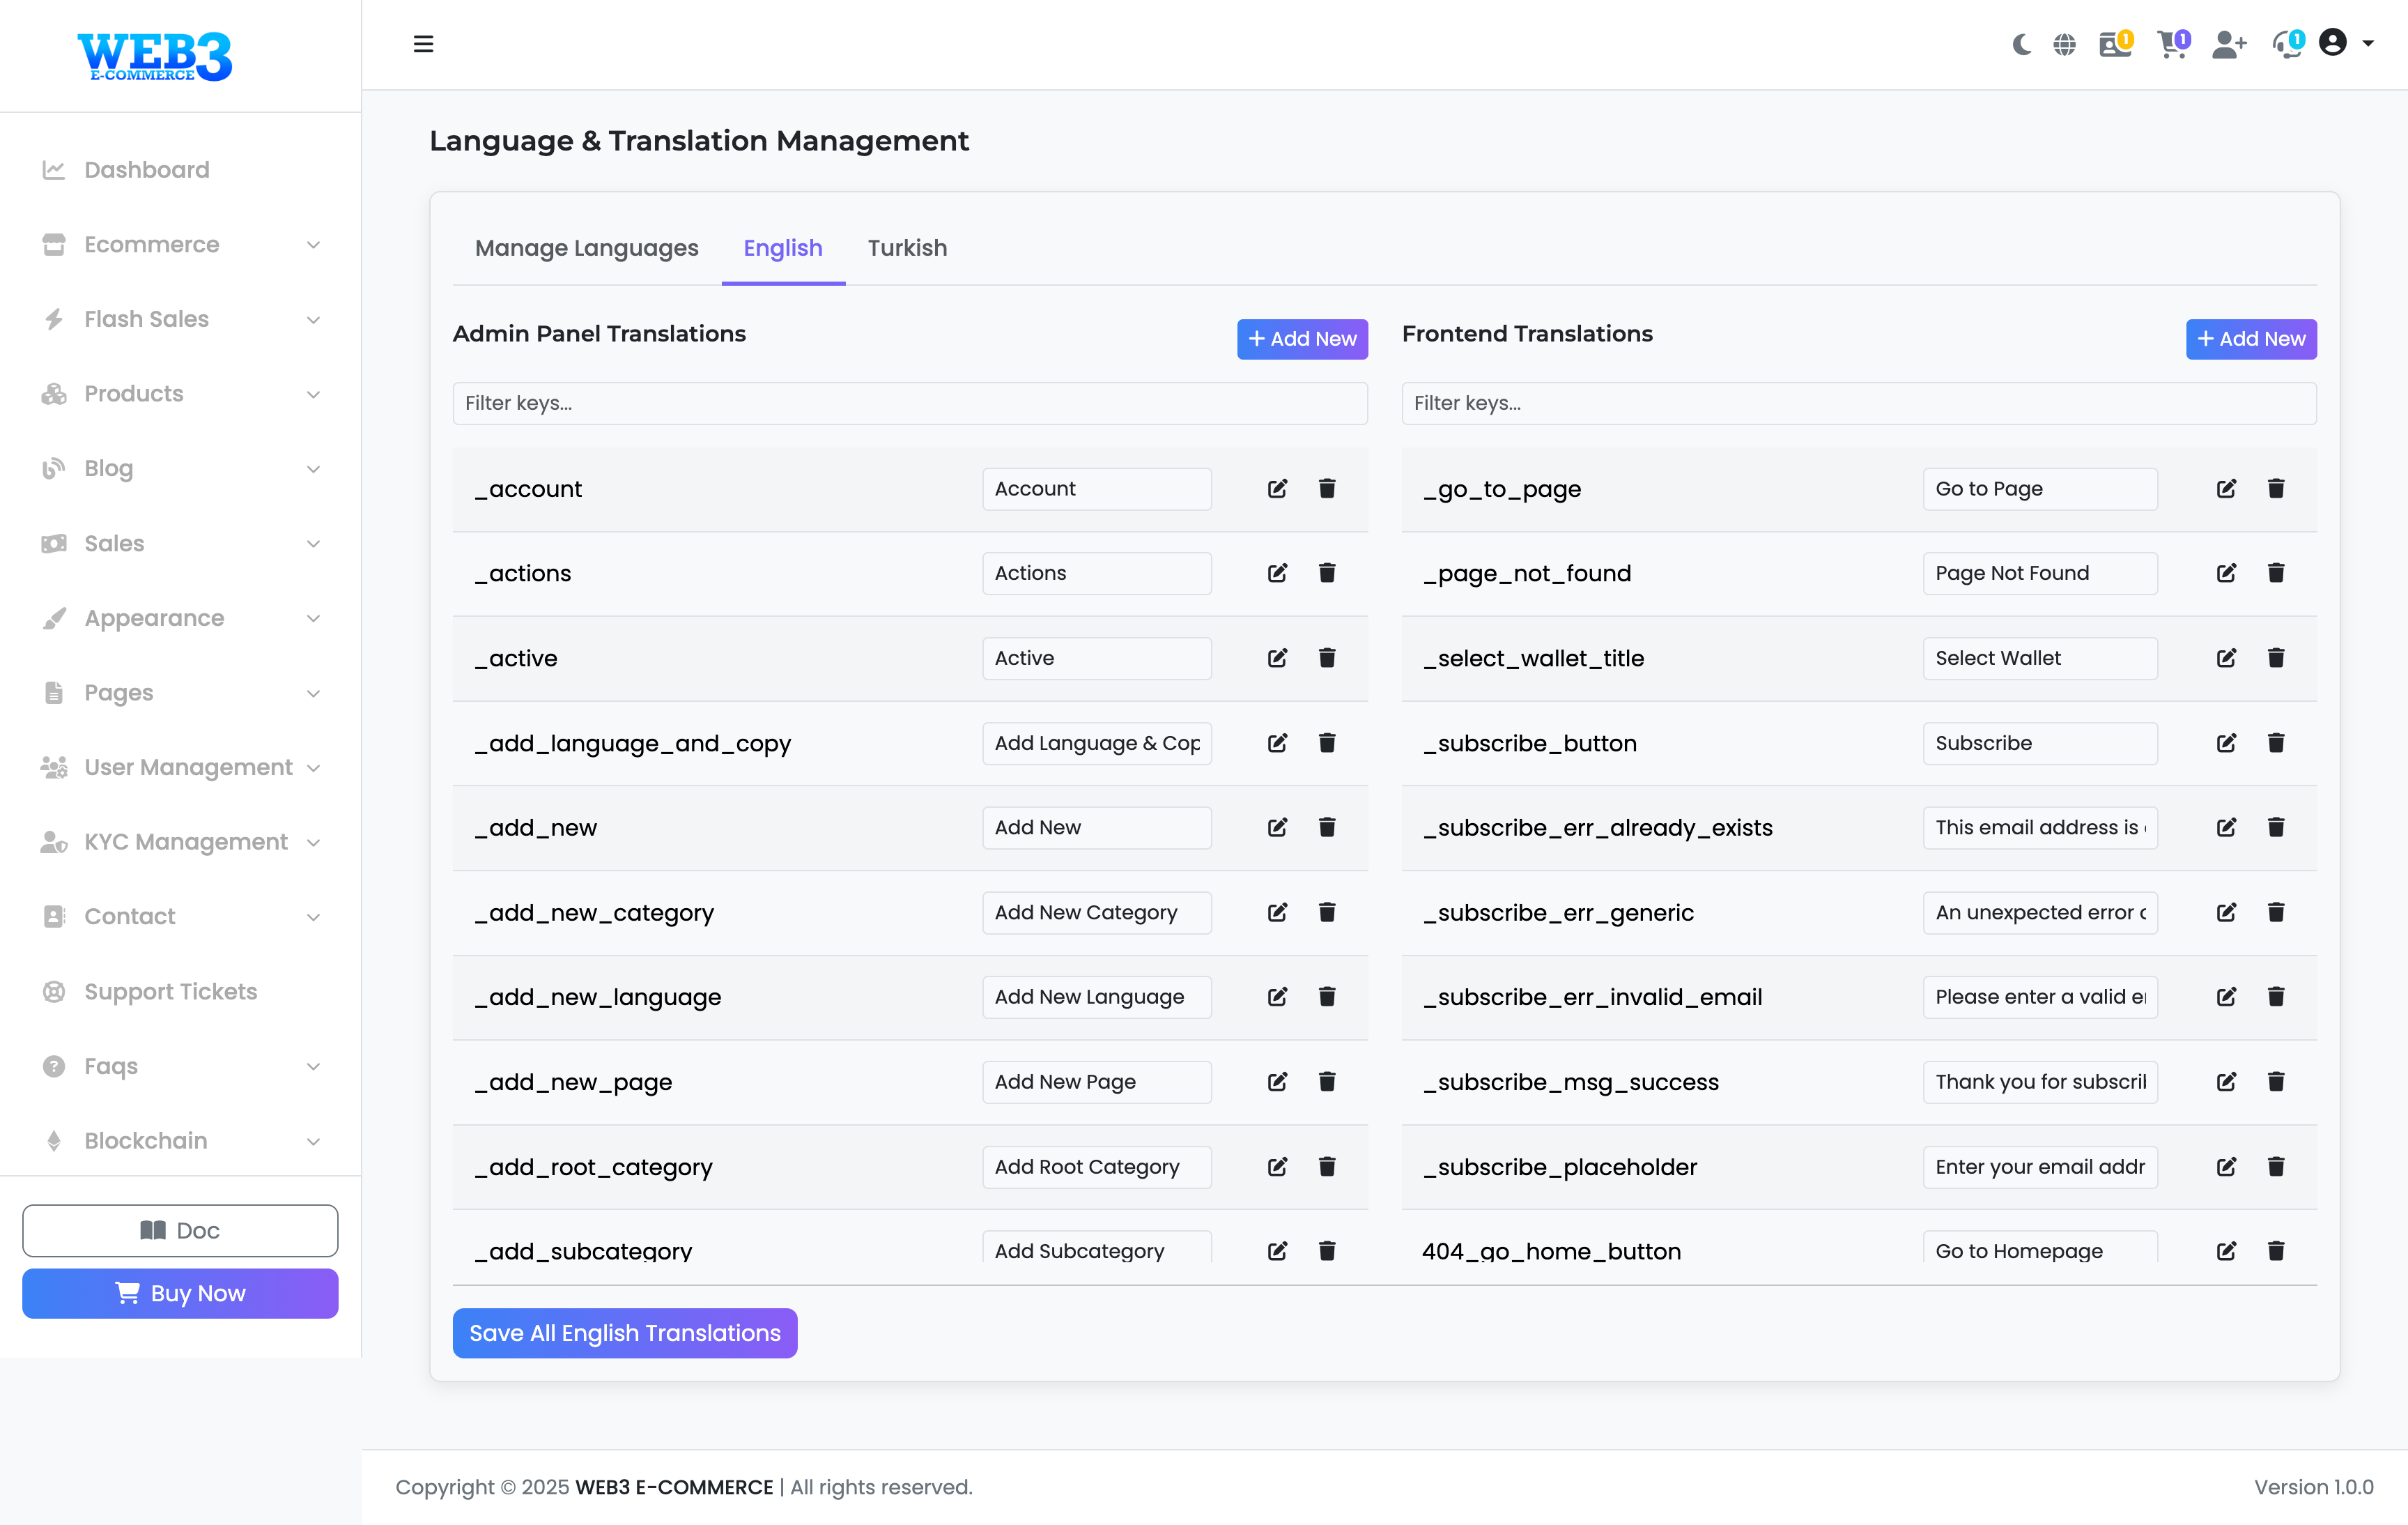
- Language Tabs: At the top, you'll see tabs for each language you've added (e.g., "English", "Turkish"). Click a tab to start translating for that language.
- Admin Panel vs. Frontend Translations: The page is split into two columns.
- Admin Panel Translations: This column contains all the text that appears in your admin dashboard.
- Frontend Translations: This column contains all the text that your public visitors see on the main website.
The Translation Process
To translate a piece of text, follow these steps:
- Select the tab for the language you wish to edit (e.g., "Turkish").
- Find the text you want to change. You can use the "Filter keys..." search box at the top of each column to quickly find a specific key or phrase.
- The text is organized in pairs:
- Key (Left Side): This is the unique identifier (e.g.,
_account,account_nav_dashboard). DO NOT change the key. - Value (Right Side): This is the text that is actually displayed. This is the field you need to edit.
- Key (Left Side): This is the unique identifier (e.g.,
- Click the "Edit" (Pencil) icon next to a value and enter your translation.
- After making your changes, scroll to the bottom and click the "Save All ... Translations" button to apply them. Your changes will not be visible on the site until you save.
Adding New Keys
The "+ Add New" button is an advanced feature for developers who add new functionality to the script and need to create new text identifiers. For general translation, you will only need to edit the existing values.