Appearance: Managing Menus
Managing Navigation Menus
The Menus section allows you to create, edit, and manage all navigation menus on your website, such as the main header menu or a footer menu. The system is structured in three levels: Menus List, the Menu Builder, and the Menu Item Editor.
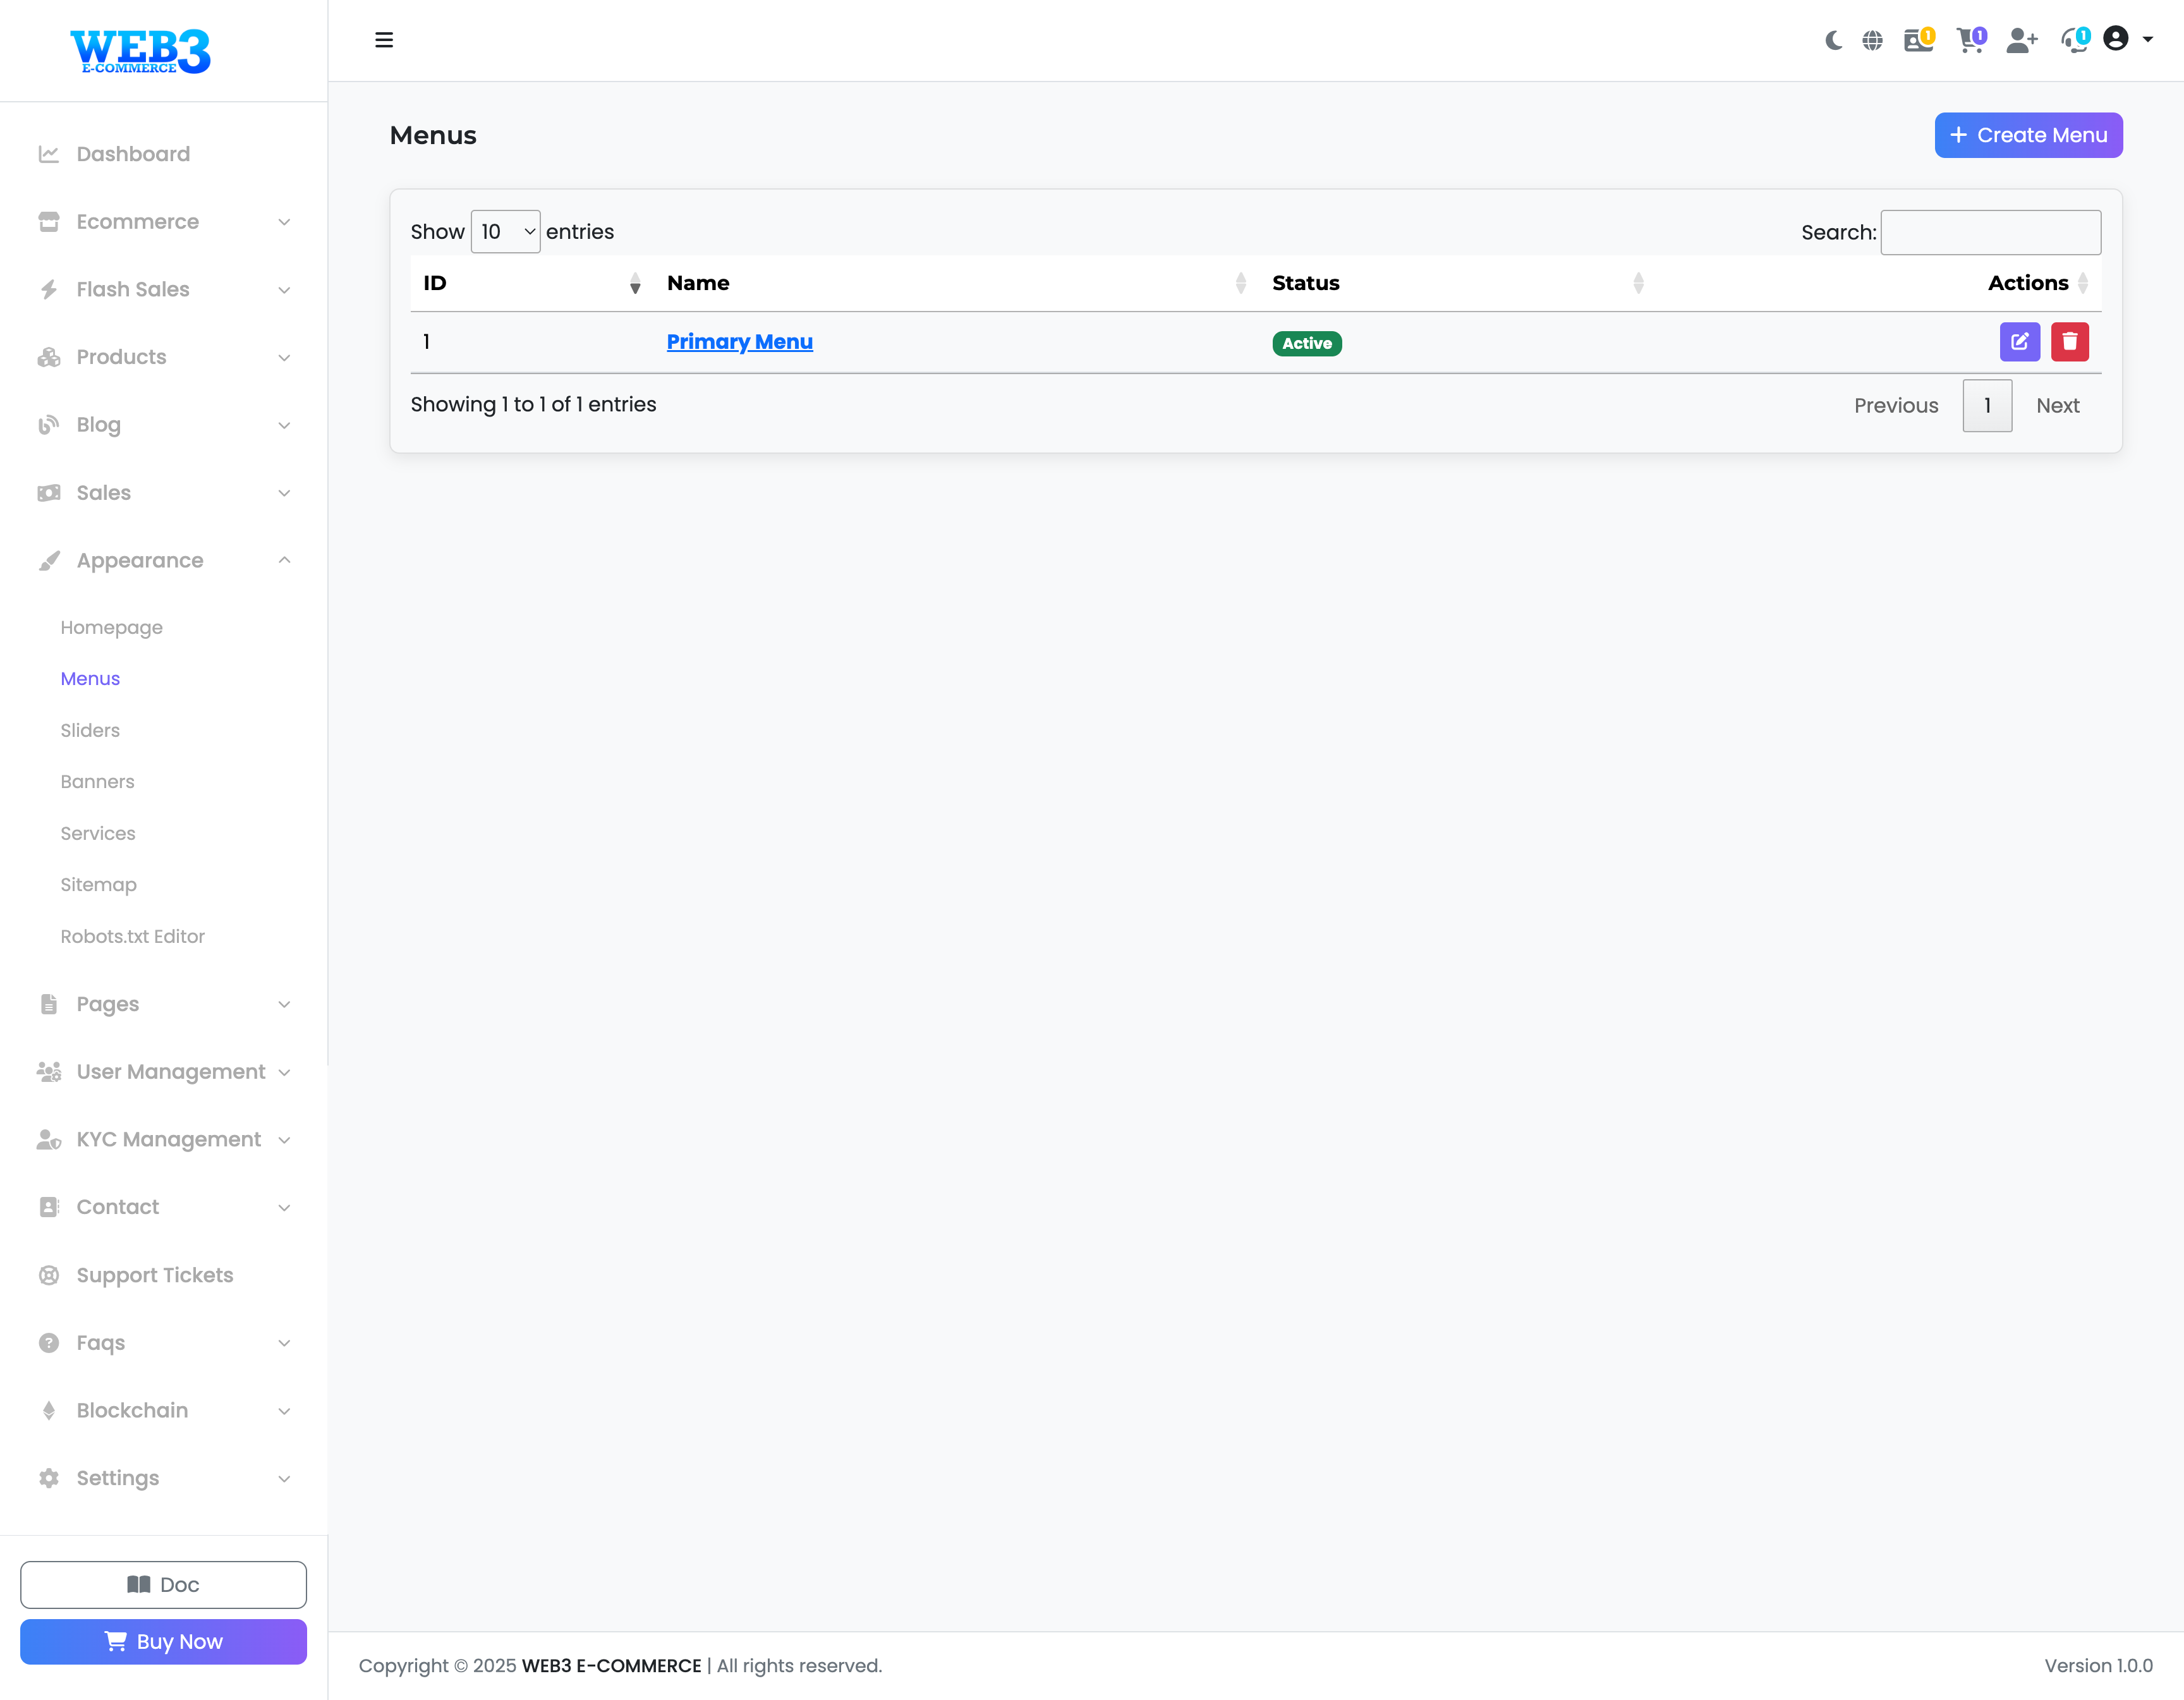
Step 1: The Menus List
This is the main page where you manage your menu "containers". For example, you might have a "Primary Menu" for your header and a "Footer Links" menu for your footer.
- Create Menu: Click this to create a new, empty menu container.
- Actions:
- Edit (Pencil Icon): Click this to open the Menu Builder for that specific menu, where you will add and arrange the links.
- Delete (Trash Icon): Permanently removes a menu and all its items.
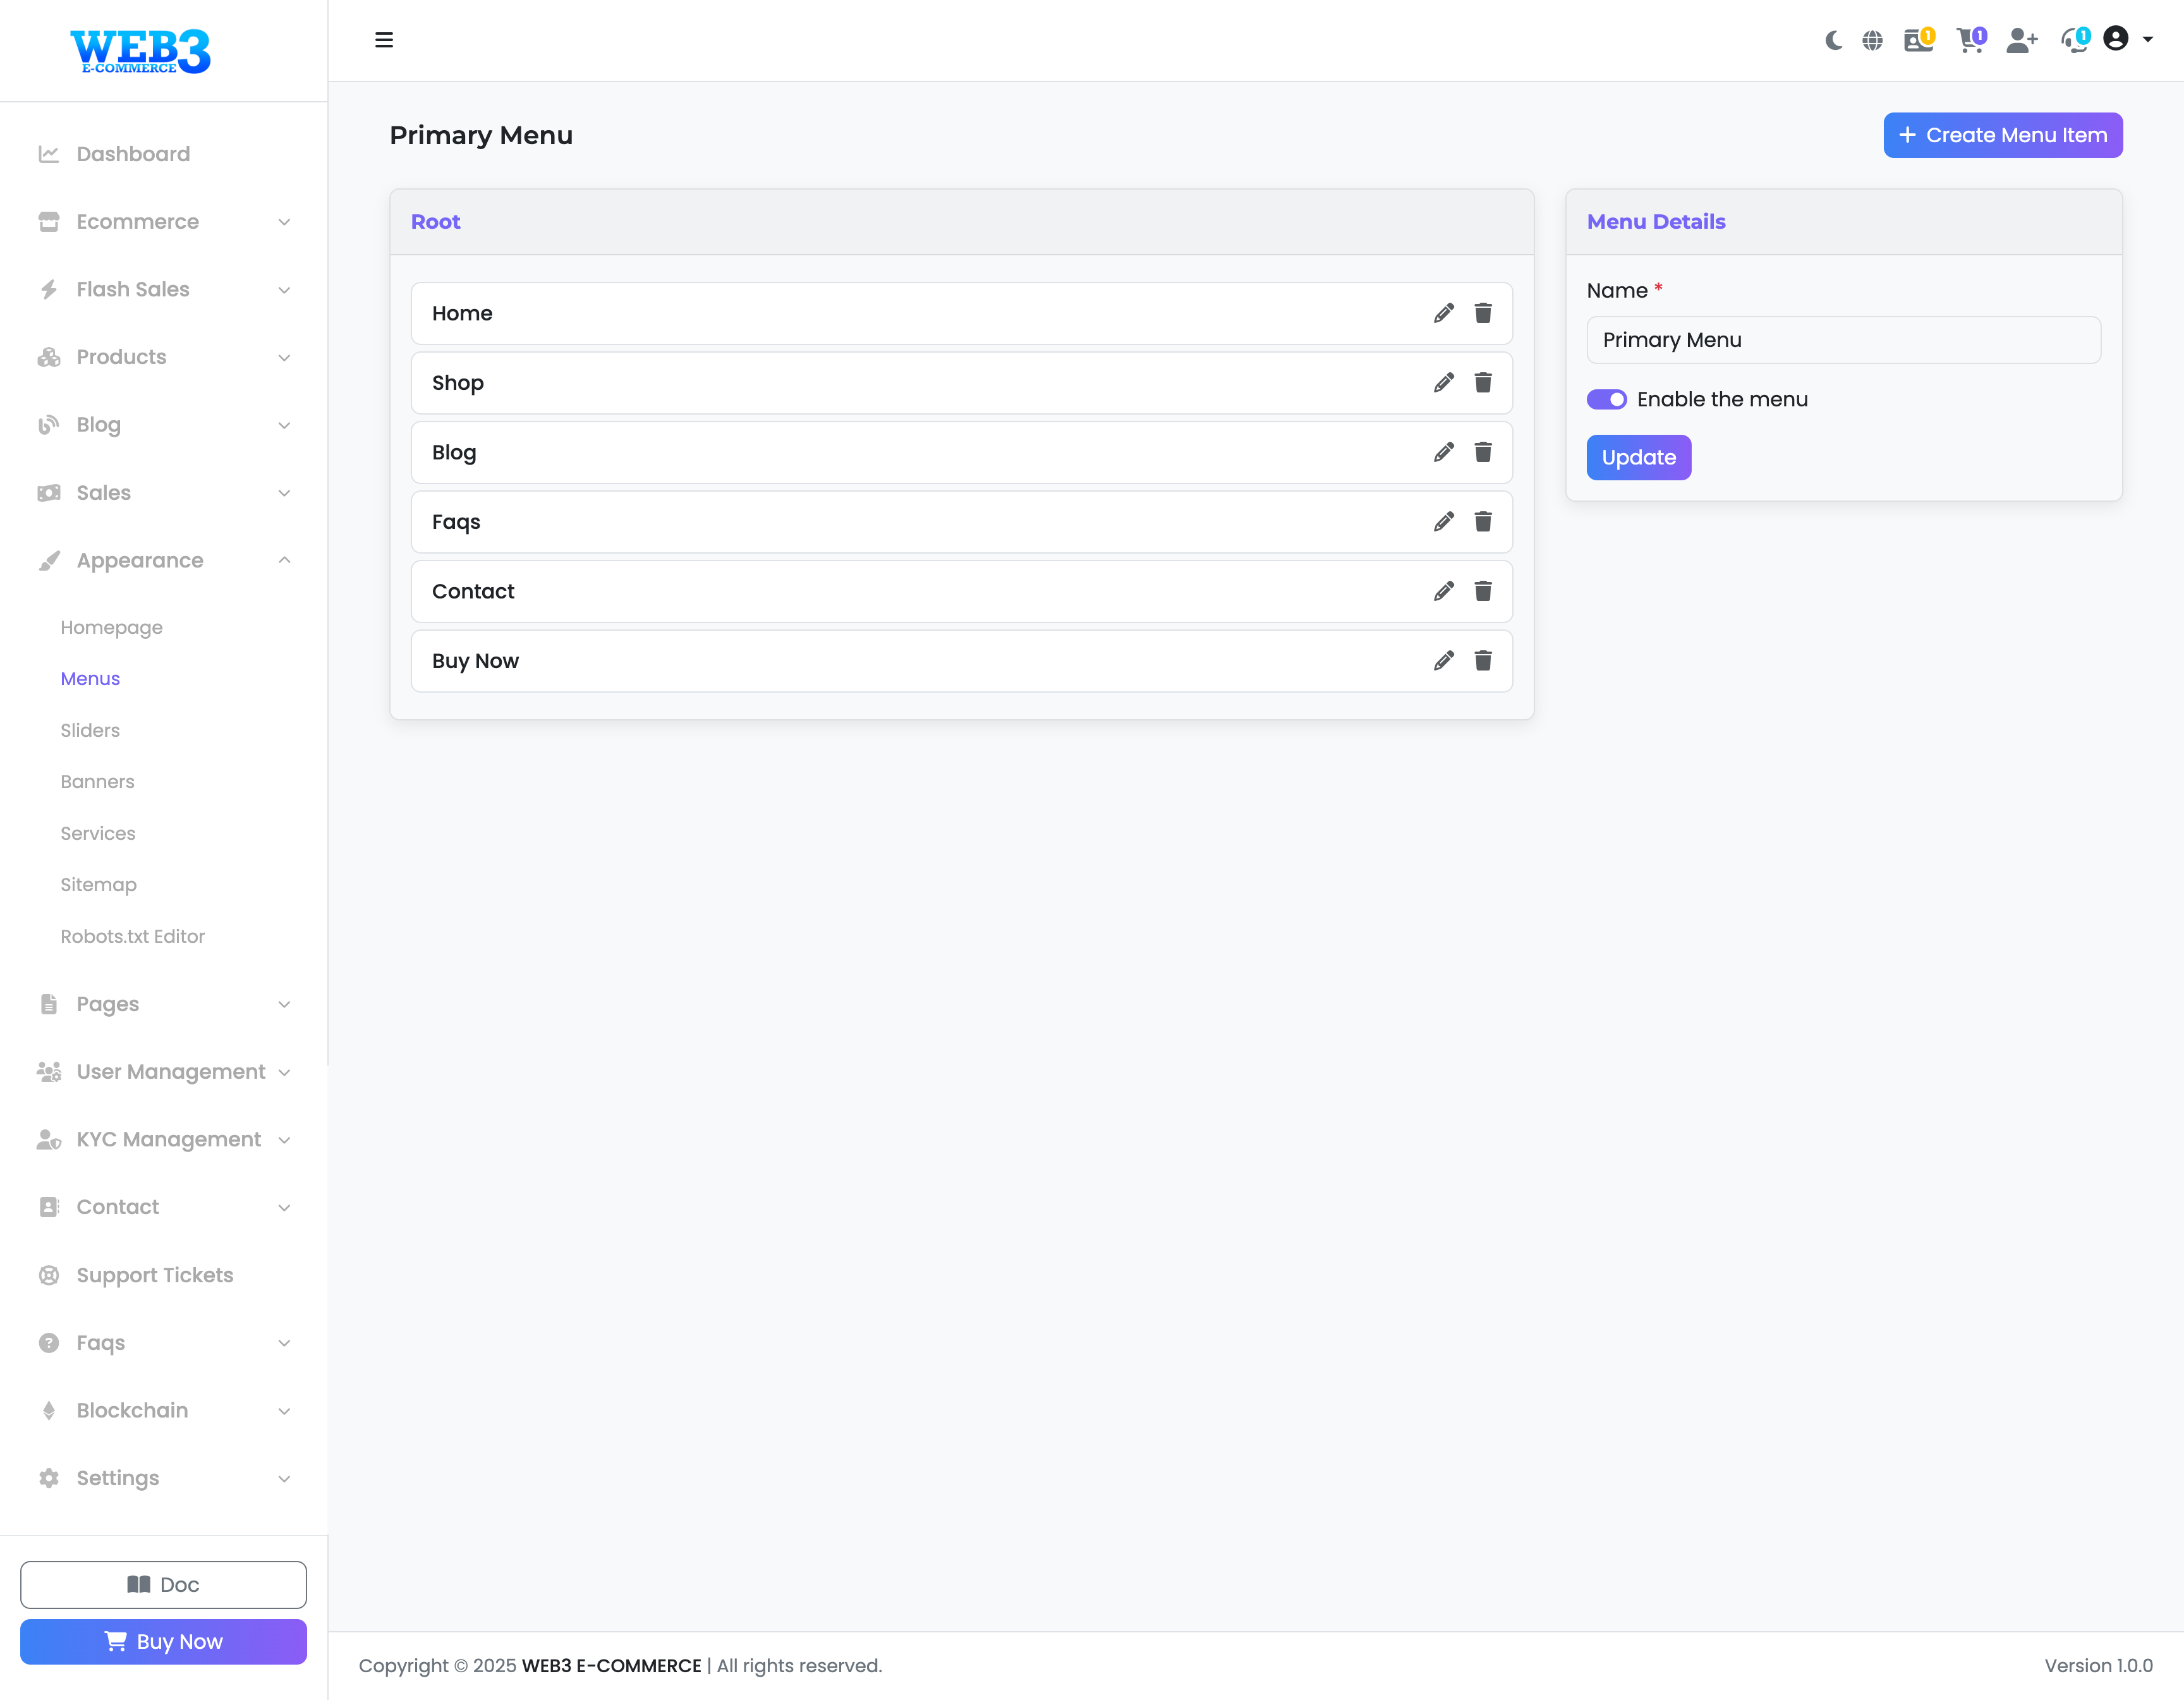
Step 2: The Menu Builder (e.g., Primary Menu)
After clicking "Edit" on a menu, you are taken to the Menu Builder. This is where you construct the structure of your menu.
- Create Menu Item: Click this to add a new link (item) to the menu. This will take you to the "Edit Menu Item" screen.
- Menu Item List: This area shows all the links currently in your menu.
- Re-ordering: You can change the order of menu items by simply clicking and dragging an item to a new position.
- Creating Sub-menus: To create a sub-menu (dropdown), drag an item slightly to the right underneath another item. It will become a "child" of the item above it.
- Actions: Click the "Edit" icon to modify a specific menu item, or the "Delete" icon to remove it from the menu.
- Menu Details: On the right, you can update the internal name of the menu and enable or disable it globally.
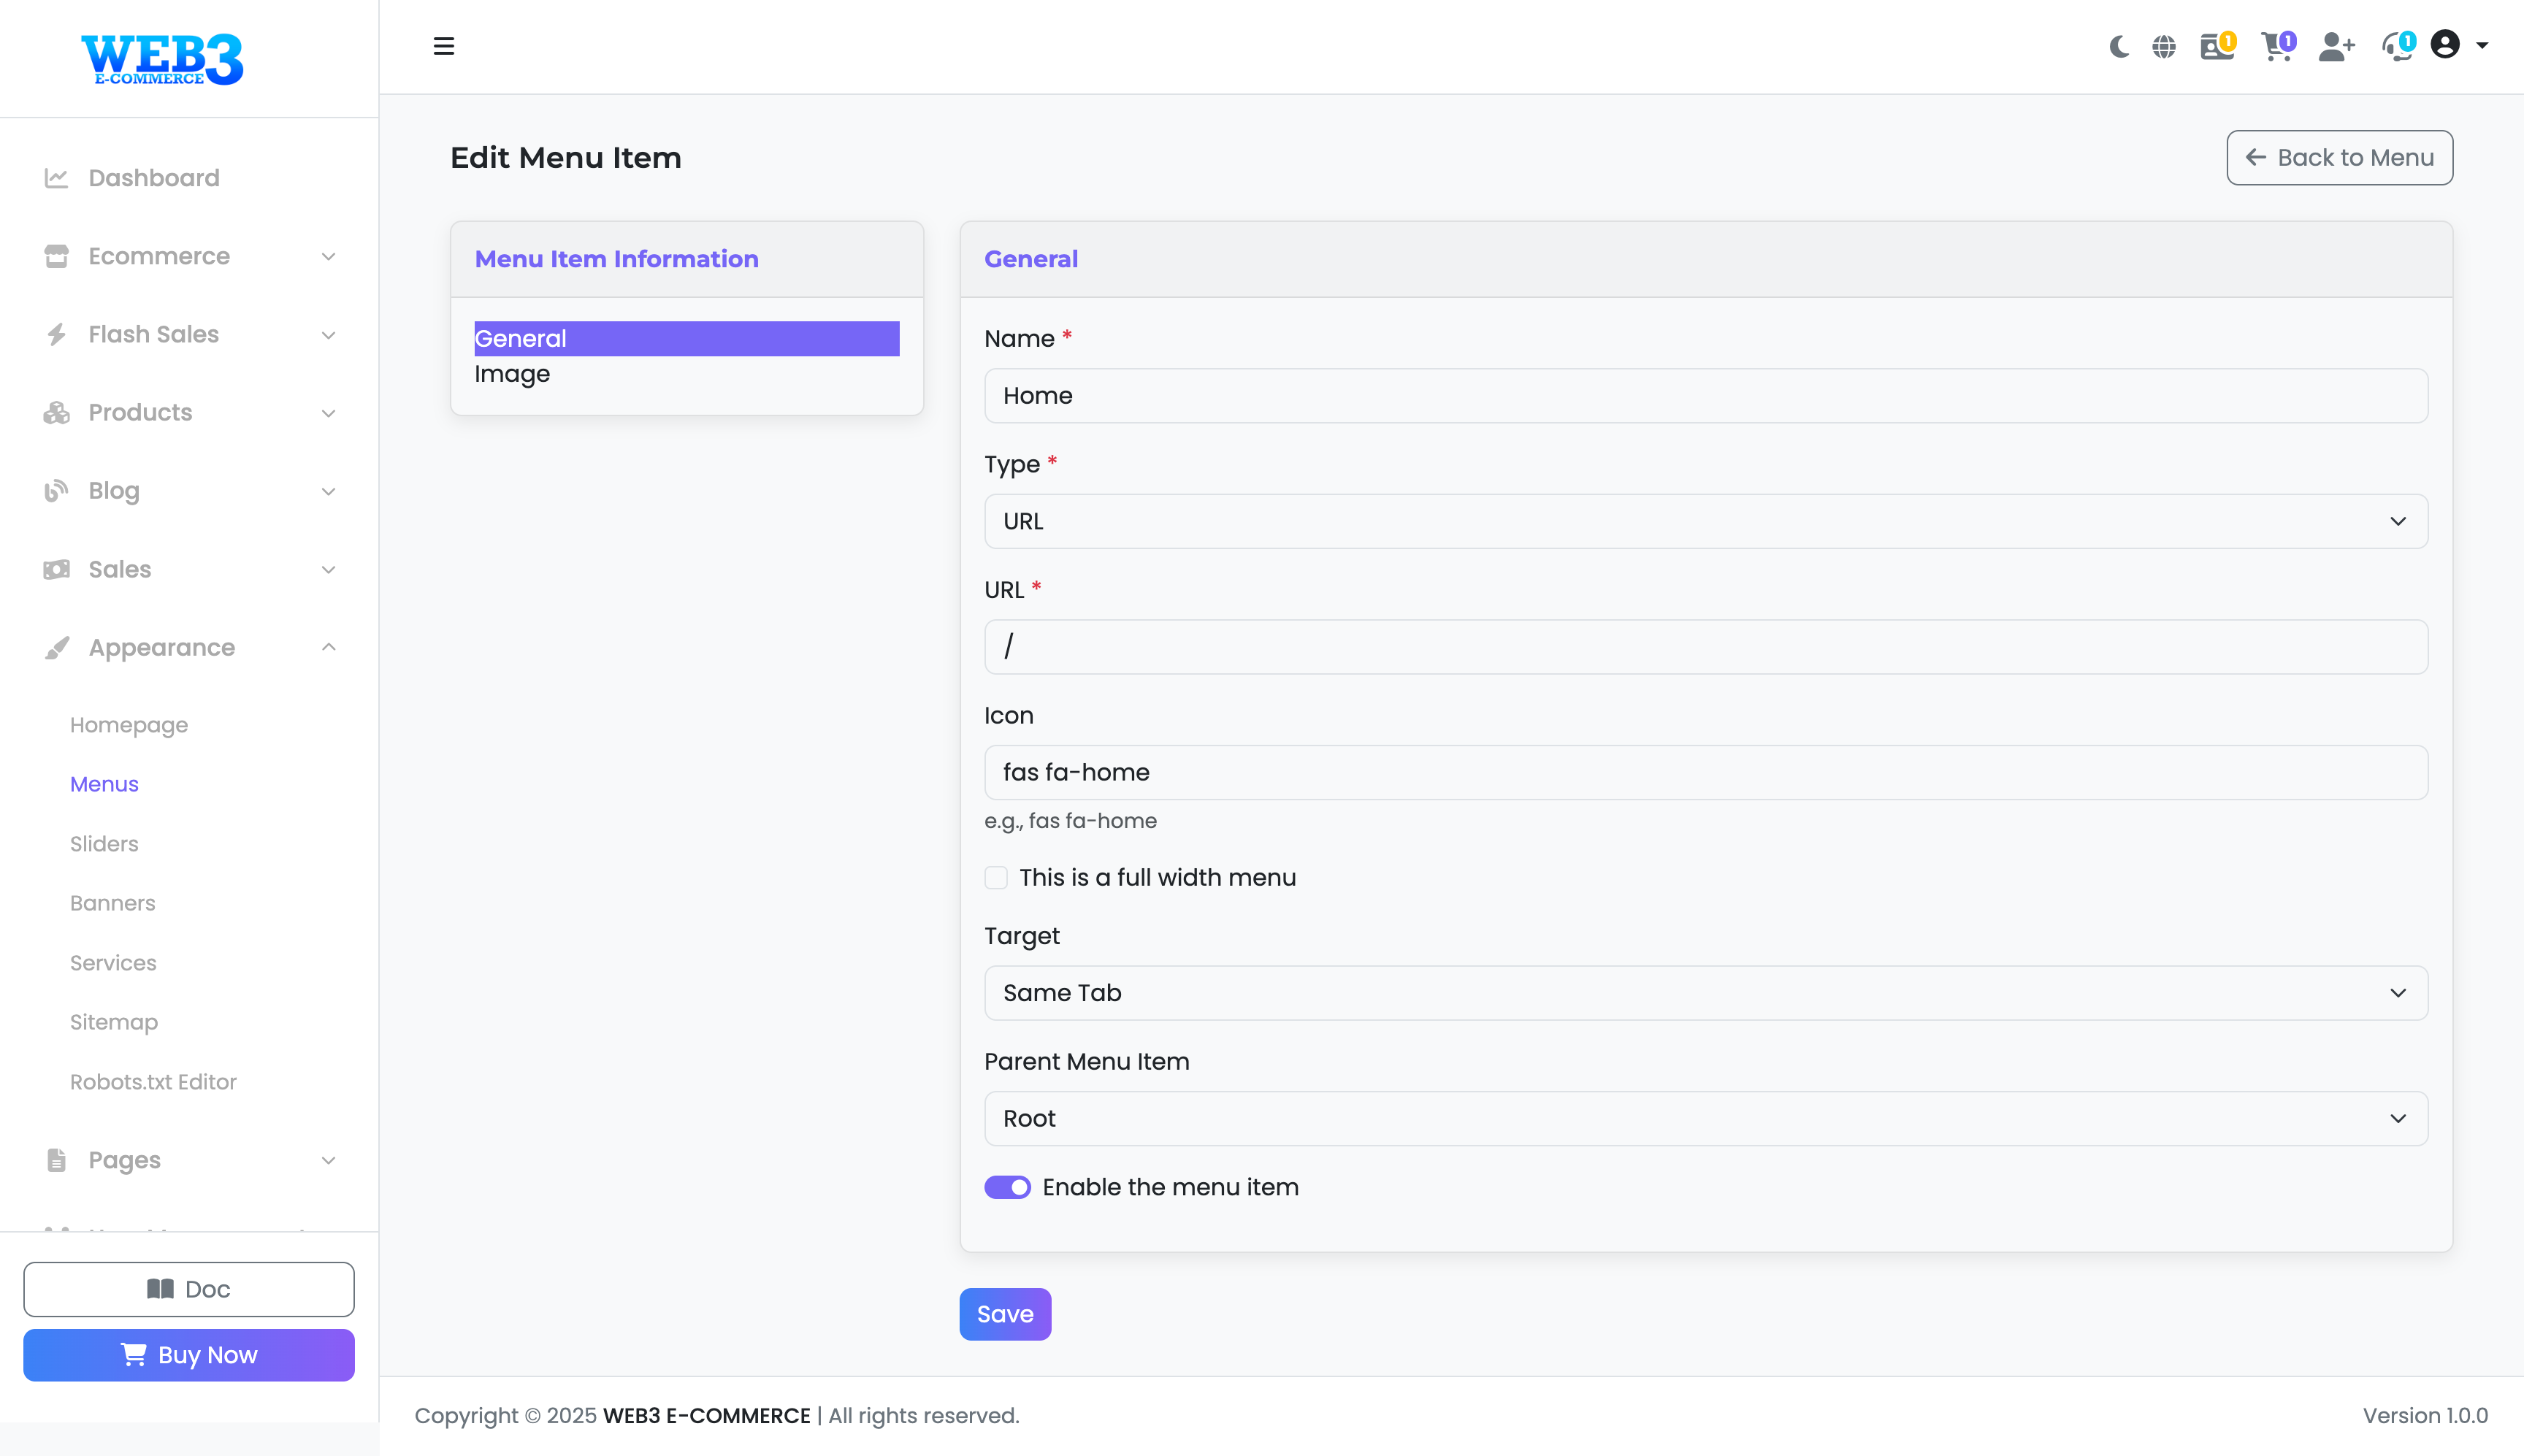
Step 3: The Menu Item Editor
This is where you define the details for a single link in your menu.
- Name: The text that will be visible to users on the website (e.g., "Home", "Contact Us").
- Type: The kind of link you are creating. Common options include:
- URL: A link to any internal or external web address.
- Page: A direct link to one of the pages you created under the "Pages" section.
- Category: A link to a specific product category page.
- URL: The destination link. Use a relative path like
/aboutfor internal pages or a full URL likehttps://example.comfor external sites. - Icon: You can add an icon next to the menu name (e.g., Font Awesome classes like
fas fa-home). - Target: Choose whether the link opens in the "Same Tab" or a "New Tab" (
_blank). - Parent Menu Item: Use this to manually assign a parent for creating sub-menus. "Root" means it is a top-level item.
- Enable the menu item: A switch to show or hide this specific link without deleting it.
Click "Save" to apply your changes to the menu item.